

During construction of medieval shoes one needs to use many different types of seams. Since there are a lot of well preserved finds from the medieval period which show exactly how the different parts of turnshoes have been attached, we also know a lot about construction of medieval shoes.
The most known categorization of seams for medieval shoes was published by Olaf Goubitz (Goubitz). It is also the widely used system for distinguishing seams in literature and finding reports. I have summarized the different types of seams in the following table.
| Name | Seam | Notation (published by Goubitz) |
|---|---|---|
| Edge/Flesh Butt seam | 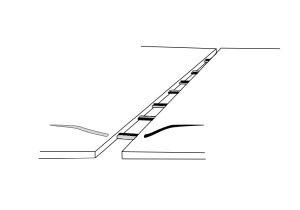 |
 |
| Binding seam to join two parts |  |
 |
| Saddle Seam |  |
 |
| Binding seam | 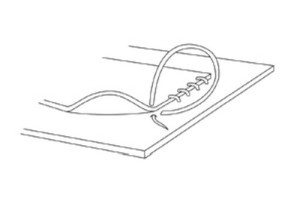 |
 |
| Binding Stitch for reinforcement cords | 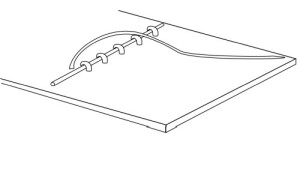 |
 |
| Lochverstärkung | 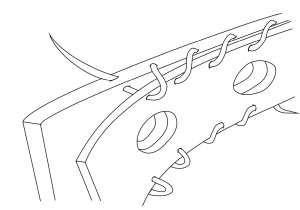 |
 |
| Seam for attaching a rand |  |
 |
| Tunnel stitch | 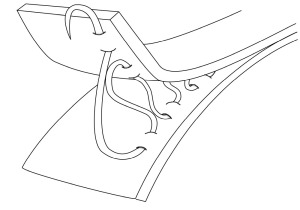 |
 |
Seams used for sewing upper parts
Buttseams
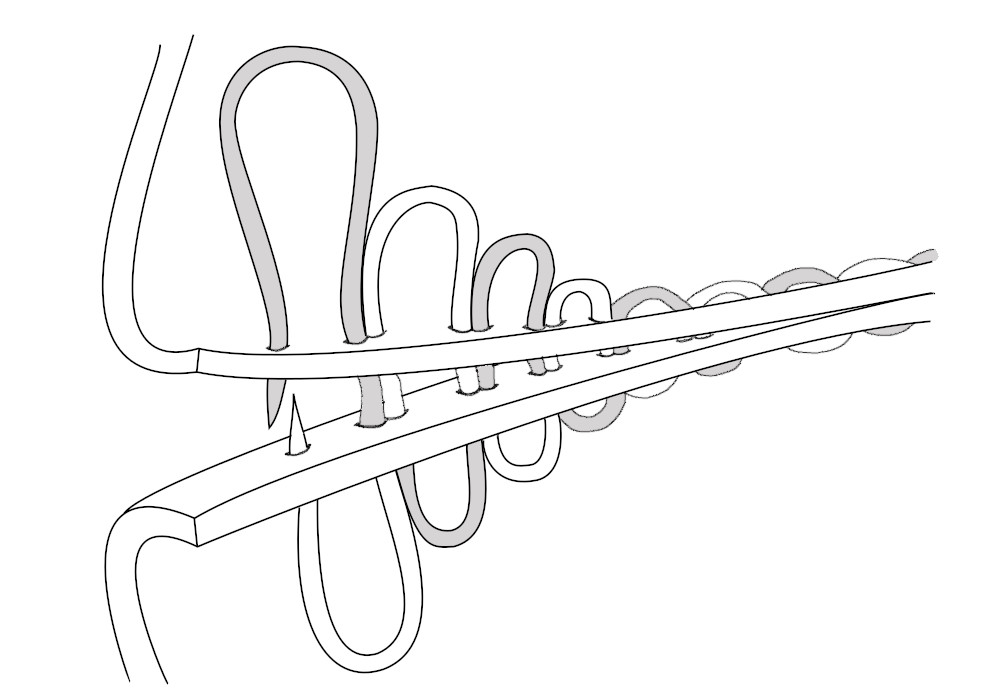
The butt seam is the strongest seam used in turnshow construction. It is mostly used for joining both sides of the upper together or attaching extensions to the main part of the upper. Other parts like tongues and facings have mostly been attached via a binding seam.

Butt seam used for closing the upper
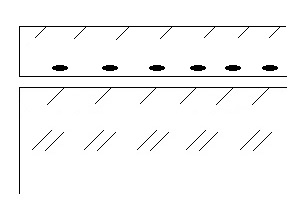
Two threads are used for sewing 1 both parts together. A pig bristle is attached to each end. Each end passes through the the stitching channel and therefore we have "2" threads joining both parts together. Compared to the saddle seam you do not get a bulge where both pieces join together, which is much more comfortable to wear on the foot. Using two threads also greatly increases stability for this seam.
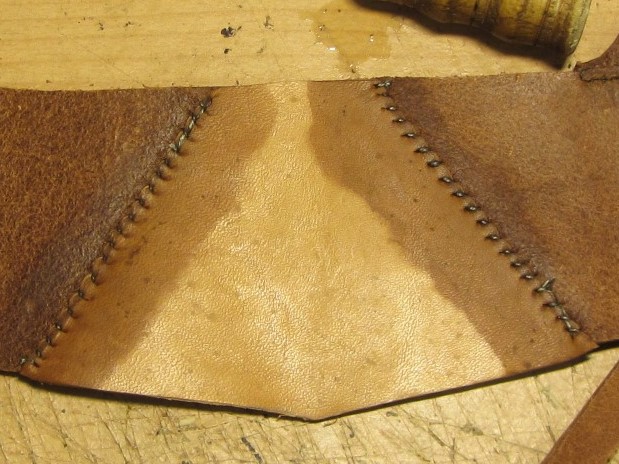
On some finds one can see that both edges on the upper parts could be 'skived'. The following picture shows a finished buttseam from the "inside" (left) and outside (right).

Closer look at the inside and outside of a finished buttsem. Left shows the inside (flesh), right the outside (grain) of the upper.
Binding stitch
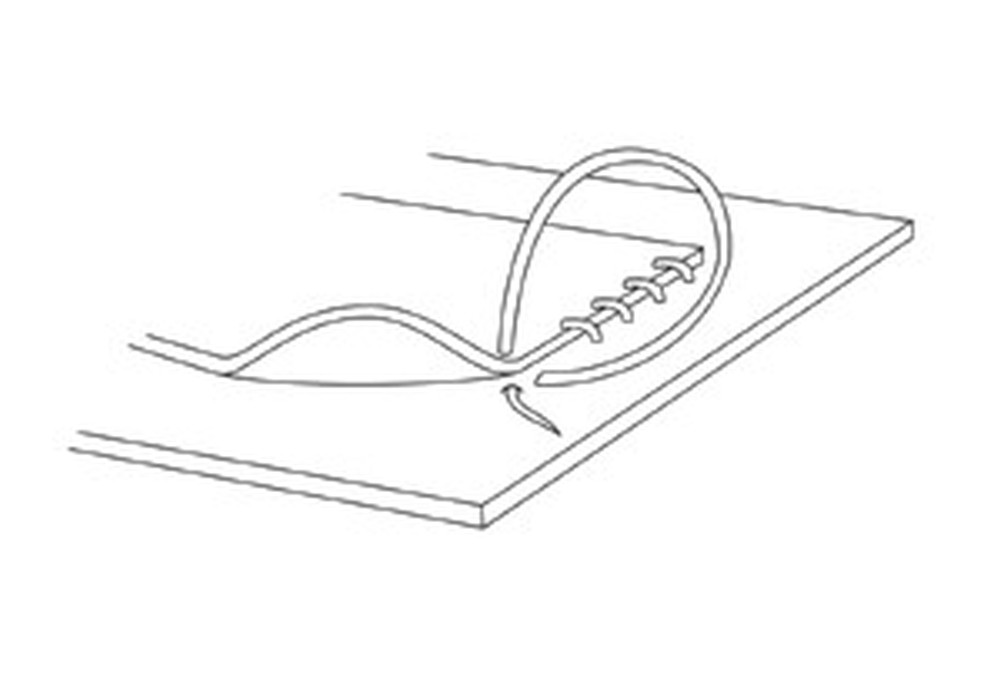
Binding stitch is often used to attach smaller pieces, like tongues, facings and smaller extensions to the upper. Since it is not as strong as the butt seam it is only used for seams which do not need to withstand high tensions.
Binding stitch to attach smaller pieces to the upper.
Saddle seam
The Saddle seam can be found in many areas of leather processing as a strong connecting seam between two leather parts.
Saddle stitch to connect two leather parts
Bind- and Reinforcement Seams
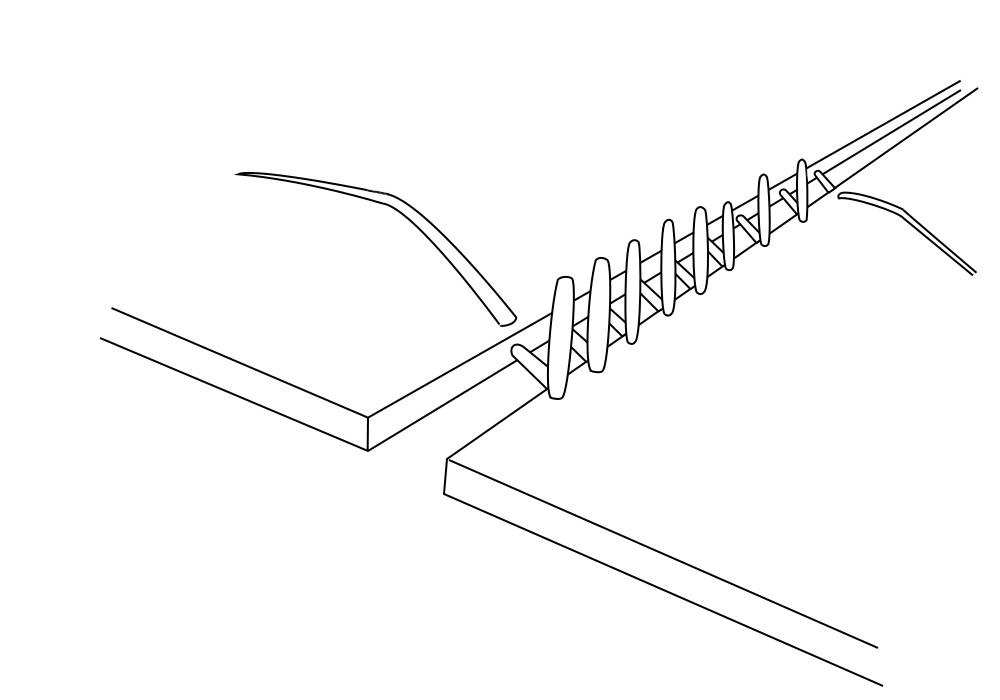
Binding Seam
The Binding seam is used to attach heel reinforcements or lateral reinforcements to the upper. Only a single thread is required for this.
Binding seam to attach a heal reinforcement or other kinds of reinforcements.
Example of a Binding seam to attach a heal reinforcement to the upper.
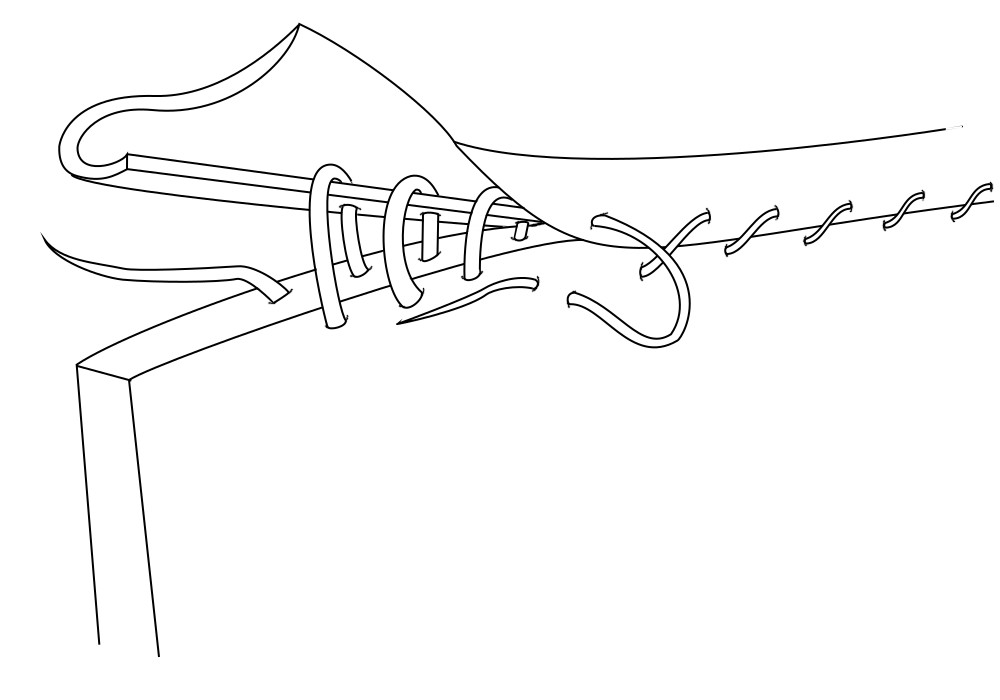
Reinforcement Cord
During the 13th century a new technique for reinforcing the leather appeared. A thick thread is attached by a binding seam to the flesh side of the leather.

Reinforcement cord sewn at the edge of the leather. This prevents the leather from stretching or breaking.
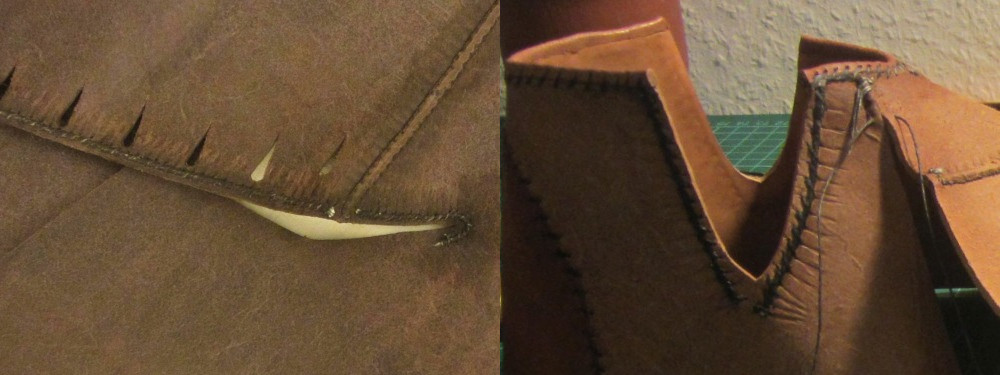
On the left a reinforcement-cord along the instep point of a high shoe. On the right a reinforcement-cord along lateral opening of a low shoe.
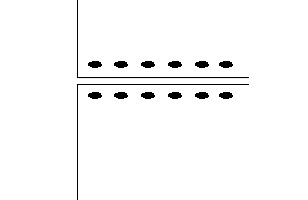
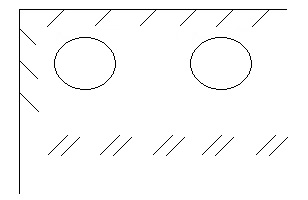
Reinforcement for lacing holes
Holes for the lacings are reinforced with an additional sewn-on leather strip. This prevents the holes from stretching or tearing.

Reinforcement for lacing holes with a sewn-on leather strip
- The reinforcement is attached at the edge via a half leather stitch to the upper. A single thread is used for the seam.
- Now the remaining sides of the reinforcement are sewn via a binding stitch.
The holes can then be punched/cut through both leather parts at the same time. The holes were not further cleaned or secured.
Other seams
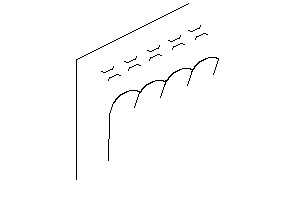
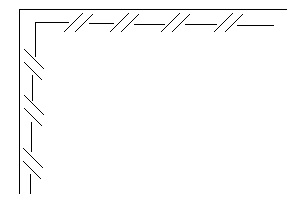
Seam for attaching a rand
Goubitz knows only one variant for sheep edge edging, which is also the most widely used variant.
Most widely used type of seam to attach a rand to the upper
Dabei wird ein dünner Lederstreifen zunächst per halben Lederstich an den Rand genäht und anschließend umgeschlagen und per Heftstich an das Oberleder gehäftet. Diese Variante lässt sich sehr schnell umsetzen, hat aber den Nachteil das der Nähfaden immer zu sehen ist und die Schaftrandeinfassung keinen sauberen Abschluss bildet. Andere etwas aufwendigere Varianten bilden einen schöneren Abschluss.
A thin strip of leather is first sewn to the edge with half a leather stitch and then turned over and sewn to the upper by a binding stitch. This variant has the disadvantage that the sewing thread is always visible and the rand does not form a clean finish with the upper. Other more elaborate variants form a more beautiful finish.
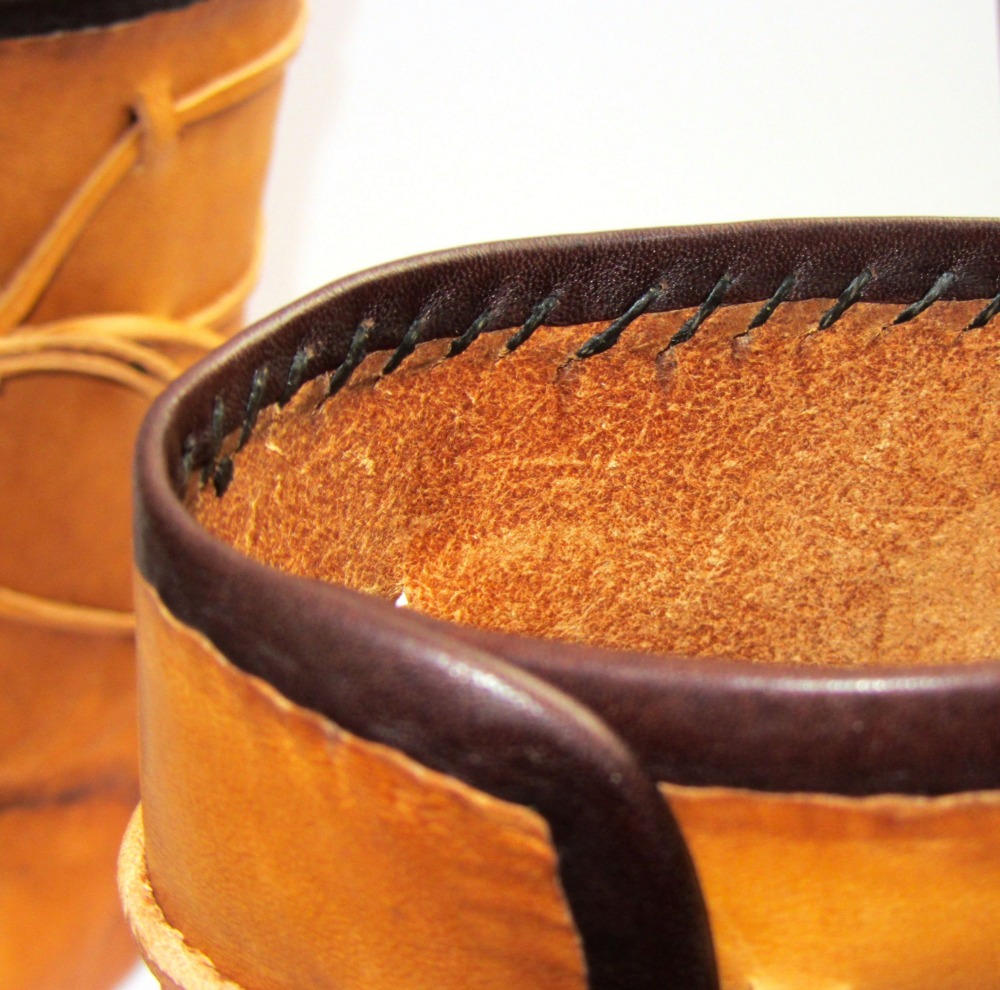
Closer look to a rand sewn to a upper.
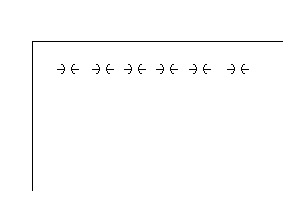
Tunnel stitch
Since the soles of turn-shoes wear through quickly (especially in the heel and front ball area), many finds still show traces of sewn-on patches.

Tunnel stitch to attach a patch directly to the sole
Sole seams
In the 13th century mostly two different seams are used to attach the sole to the upper:
The first variant with a small leather stripe in between
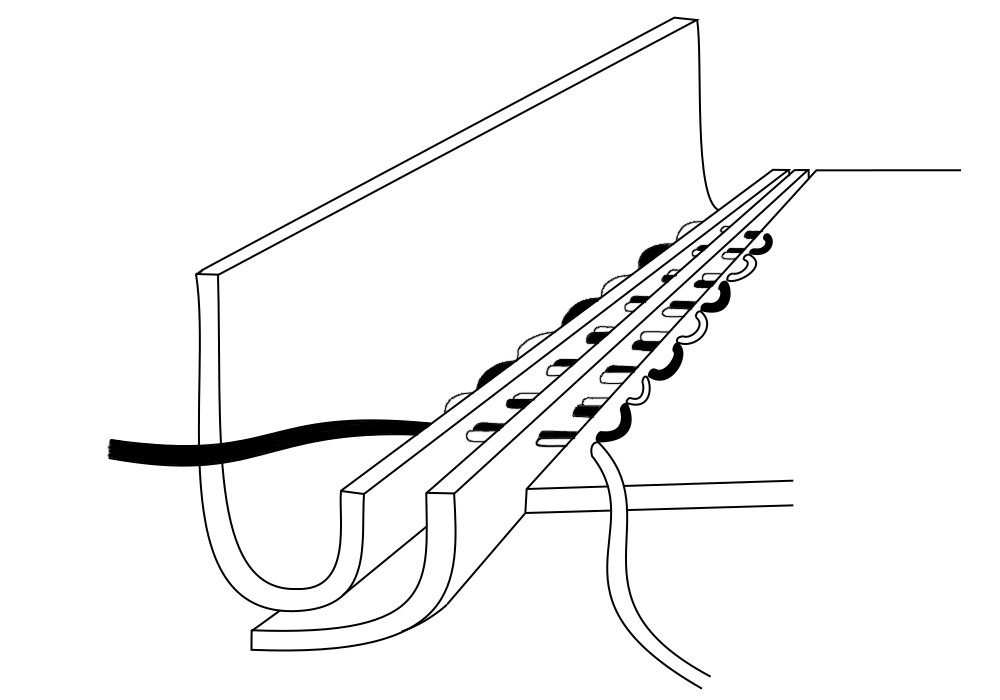
Seam to attach the sole and the upper with a small leather stripe in between
Without small leather stripe:
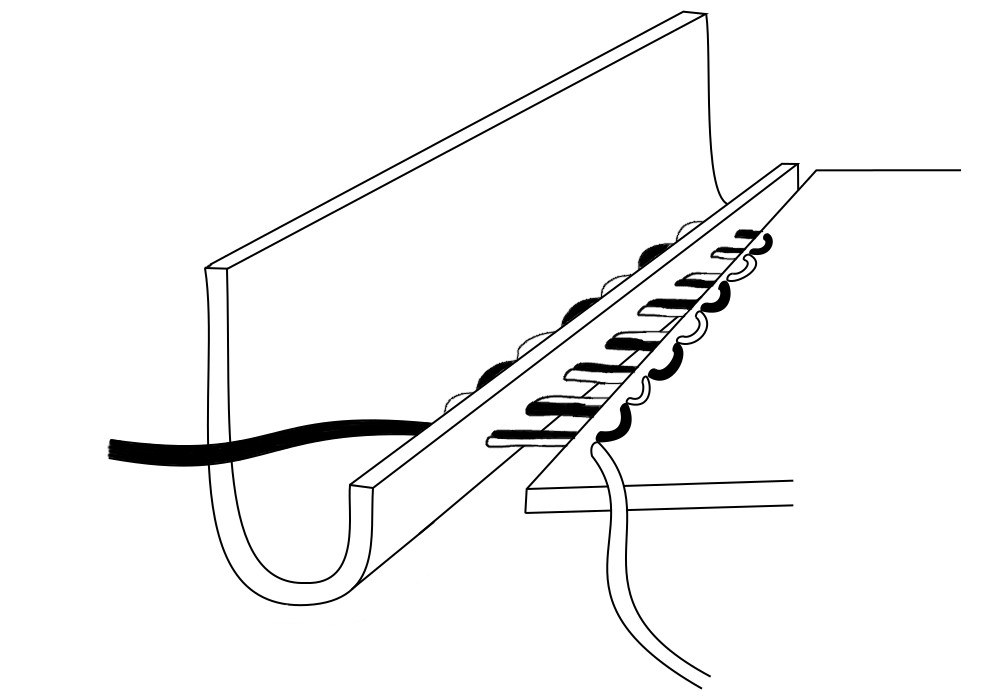
Seam to attach the sole to the upper without a leather stripe in between
In the literature it is often assumed that this strip is used to get the seam tighter and more water proof. From my personal experience I can say that the shoes do not become more or less water proof by using this leather strip 3. But it has another big advantage!
Due to the way the upper and sole leather are joined together, the upper leather is always slightly overhanging at the side. As time goes by, and the leather is worn, the upper is pushed further down and comes into contact with the ground. As it is much thinner than the sole, it wears through much faster then the sole. To counteract this wear you can insert a a small leather strip. The overhanging upper leather is now protected by the leather strip and the shoe lasts longer. In the finds one finds some examples where the leather strip is only present in the area of the toes and the heel. Others have a leather strip all arround the sole.

Example of a complete sole seam with a leather strip between sole and the upper
Sources
- Goubitz, Olaf; van Driel-Murray, Carol; Groenman-van Waateringe, Willy (2001): Stepping through time. Archaeological footwear from prehistoric times until 1800. Zwolle: Stichting Promotie Archeologie.
- Actually it is only one thread whose both ends are used. To distinguish the two they were highlighted in black/white. [return]
- The edges of the heel reinforcement are sharpened with a knife before sewing onto the upper. [return]
- It depends only off the quality of the leather and the execution of the seams if the sole seams is more or less water proof. Pulling the seam tight results in very waterproof seam. [return]